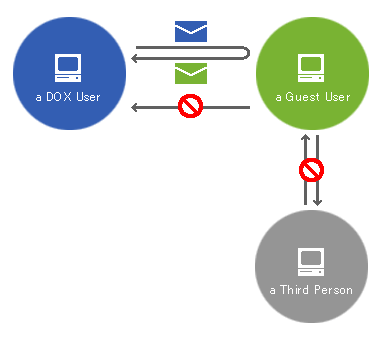
DOX Onetime Upload uses the DOX mail function to provide temporary privileges to users who do not have an account, allowing them to upload a file once.
All of the following requirements must be met to use this reply function:
The maximum number of replies is equal to the number of mail addresses specified in To and Cc. For mail with one mail address specified in each of To and Cc, up to two users can reply. Additionally, when the incoming mail page is open while logged in to DOX, the "Reply" button is displayed regardless of the above requirements. This means that DOX users can reply to each other without limit.
The Onetime Upload function is like a return postcard using e-mail. This function allows users receiving mail from a DOX user to reply by mail with a file attachment.


| Term | Description |
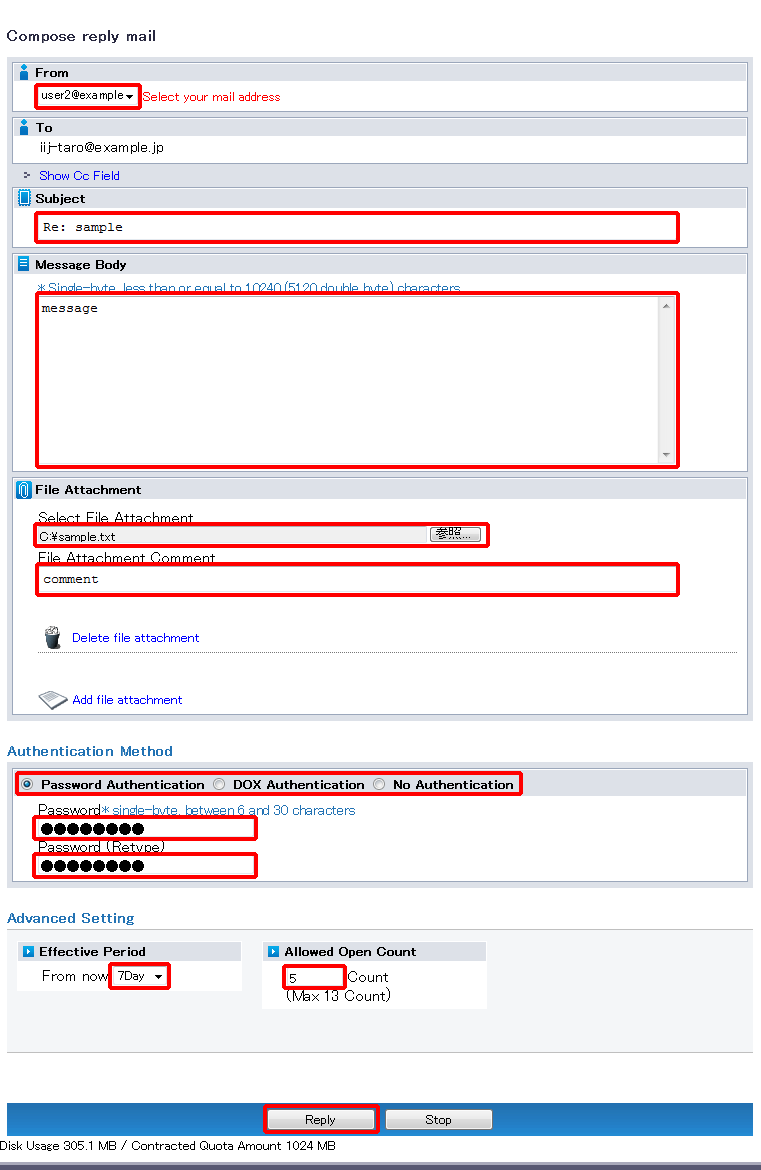
| Select From (required) | Select the mail address of the user using the reply function from the list box. |
| Cc | Click "Show Cc Field" to display a text box, and enter the Cc address. |
| Subject | Enter a subject. |
| Message Body | Enter the body of the message. |
| File Attachment | Select a file to attach to the mail. The file uploads to DOX instead of actually being attached to the message. Message will have the URL link to the file. |
| File Attachment Comment | You can enter a comment for the file attachment. |
| Authentication Method (required) | Select from "Password Authentication", "DOX Authentication" or "No Authentication". |
| Password (Retype) | Enter the password again. |
| Effective Period | Specify the period during which the file attachment can be accessed. |
| Allowed Open Count | Set an Allowed Open Count between 1 and the maximum. The maximum count can be changed in "Manage/View" under "Misc". |

